Sunday, 2 February 2025

𝐓𝐡𝐞 𝐈𝐦𝐩𝐨𝐫𝐭𝐚𝐧𝐜𝐞 𝐨𝐟 𝐀𝐥𝐢𝐠𝐧𝐦𝐞𝐧𝐭 𝐢𝐧 𝐆𝐫𝐚𝐩𝐡𝐢𝐜 𝐃𝐞𝐬𝐢𝐠𝐧


A perfect alignment will provide a good basis for most graphics designs so as to create harmonious, readable, and professional visual results. It plays a significant role in organizing elements on a page, creating a sense of order, and guiding the viewer's eye well. Here's why alignment matters:


1. Enhances Readability & Clarity

Proper alignment places text and images in an ordered way, and this makes it easier to read and understand content. Misaligned elements can make the content look confusing and littered with too much visual matter.


2. It Gives a Professional & Polished Look

Alignment in well-designed work tends to look better structured, visually appealing, and professionally done. A design poorly aligned can create an unstructured look and give the impression of being amateurly done.


3. Enhances Visual Connection Among Elements

Alignment helps create a relationship between the different elements of the design, such as text, images, and buttons, making the design feel cohesive and connected.


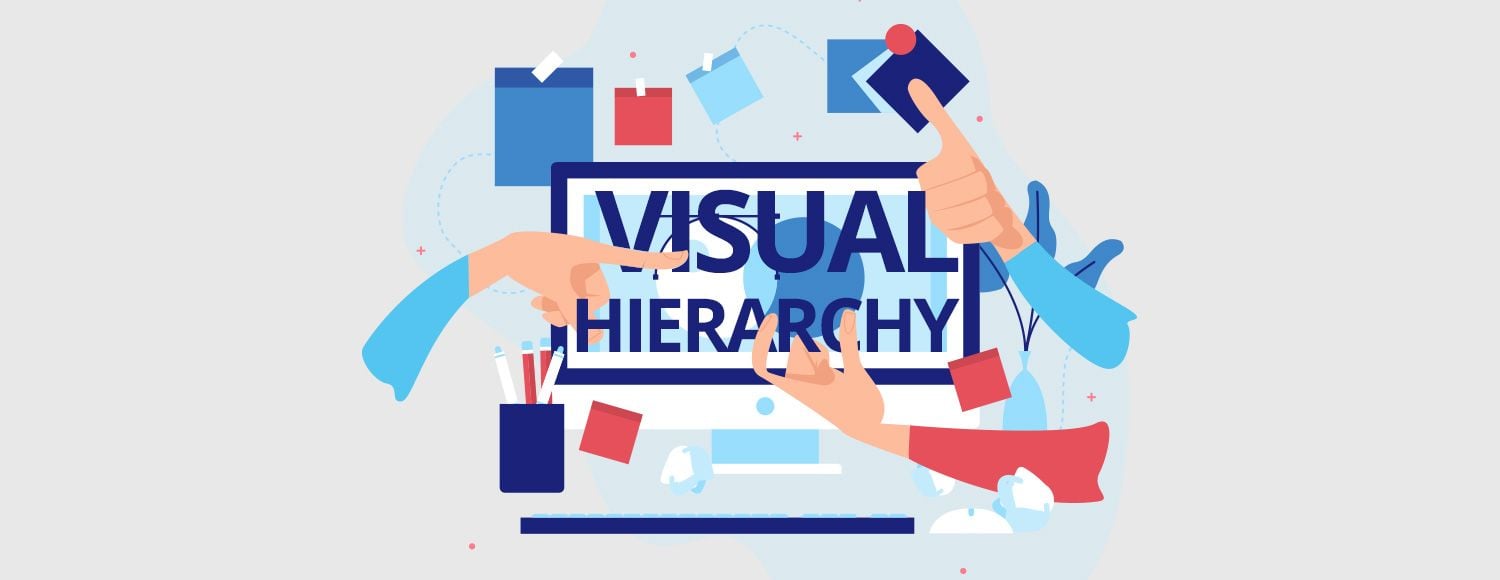
4. Helps in Hierarchy & Flow

Proper alignment guides the viewer's eye naturally through the design, ensuring they absorb the most important information first. It helps create a clear hierarchy that improves the overall user experience.


5. Enhances Balance & Consistency

Using left, right, center, or justified alignment brings consistency to the design itself to culminate into a balanced composition that feels structured and harmonious.


6. Enhances Brand Credibility

Well-aligned graphics convey professionalism and attention to detail, which helps build trust and credibility with your audience.


Best Practices on Alignment in Design

  • Use grids and guides for consistency
  • Align elements to a common edge (left, right, center) for a clean appearance.
  • Elements should be kept equidistant for balance.
  • Too many different alignment styles in one design is a no-no.

Friday, 31 January 2025

𝐇𝐨𝐰 𝐭𝐨 𝐖𝐨𝐫𝐤 𝐰𝐢𝐭𝐡 𝐃𝐢𝐟𝐟𝐞𝐫𝐞𝐧𝐭 𝐅𝐢𝐥𝐞 𝐓𝐲𝐩𝐞𝐬 𝐢𝐧 𝐆𝐫𝐚𝐩𝐡𝐢𝐜 𝐃𝐞𝐬𝐢𝐠𝐧


Compatibility, quality, and the desired final output can be ensured in graphic design only if one is working with various file types. Here's a guide on how to handle various file types effectively:


1. Raster vs. Vector Files

  1. Raster Files (Bitmap Images)

  • Formats: JPEG, PNG, GIF, TIFF, PSD
  • Made of pixels, resolution-dependent (scaling can cause pixelation).
  • Best for digital images, web graphics, and photo editing.
  • Use TIFF or PSD for high-quality images.
  • Use PNG for transparent backgrounds.

Vector Files

  • Formats: AI, EPS, SVG, PDF
  • Comprises paths; resolution-independent (scalable without loss of quality).
  • Best used for logotypes, icons, illustrations.
  • AI is the main vector file format
  • SVG is very common for web graphics


2. Basic File Formats Knowledge

JPEG (.jpg/.jpeg)

JPEG

  • Best for photographs and web use
  • Lossy compression means the image quality loses a percentage with every save
  • Do not make it good for transparency or any kind of print

PNG (.png)

  • Transparency can be used
  • Lossless compression is far better than JPEG
  • PNG is common usage for web graphics and digital design

GIF (.gif)

  • Supports simple animations.
  • 256-color only, which is not perfect for high-definition images.
  • For small web animations and simple graphics.

TIFF (.tif)

  • High-quality lossless format.
  • Professional printing and high-resolution images.
  • It's a big file, and hence it's not good for the web.

PSD (.psd)

  • This is Adobe Photoshop's native format.
  • Layers, transparency, and all that good stuff are supported.
  • Good for detailed graphic editing.

AI (.ai)

  • Adobe Illustrator's native format.
  • Perfect for creating and editing vector graphics.
  • Used for logos, illustrations, and print designs.

EPS (.eps)

  • Multiple design software compatible in vector format.
  • Ideal for professional printing and graphics that can be scaled.
  • Generally used for logos and branding material.

SVG (.svg)

  • XML-based vector format for web and digital use
  • Scalable without losing the quality
  • Commonly used in web design and responsive graphics.

PDF (.pdf)

  • Format for both raster and vector elements.
  • Ideal for print and digital documents.
  • Formatting remains the same in different devices.


3. Selection of File Format

  • For Web & Digital Use → JPEG, PNG, GIF, SVG
  • For Print Design → TIFF, PDF, AI, EPS
  • For Editing & Layered Files → PSD, AI


4. Best Practices

  • Always work with the highest quality files to avoid loss of resolution.
  • Use vector formats for logos and illustrations to keep them scalable.
  • Save multiple versions (editable + export format) for flexibility.
  • Convert files appropriately when sharing with clients or printers.

"Let’s Create Your Website-Contact Us Now!

Wednesday, 29 January 2025

𝐇𝐨𝐰 𝐭𝐨 𝐈𝐧𝐜𝐨𝐫𝐩𝐨𝐫𝐚𝐭𝐞 𝐏𝐡𝐨𝐭𝐨𝐠𝐫𝐚𝐩𝐡𝐲 𝐢𝐧𝐭𝐨 𝐆𝐫𝐚𝐩𝐡𝐢𝐜 𝐃𝐞𝐬𝐢𝐠𝐧


Incorporating photography into graphic design can add depth, realism, and emotional appeal to your designs. Here’s how you can effectively blend the two:

1. Choose High-Quality Photography

  • Use high-resolution images to maintain clarity.
  • Select photos with good lighting and composition.
  • Ensure the images match the theme and message of your design.

2. Create a Visual Hierarchy

  • Use photography as a focal point to guide the viewer’s eye.
  • Balance text and images so they complement each other.
  • Apply cropping techniques to remove distractions.

3. Blend with Graphic Elements

  • Overlay shapes, textures, or typography onto photos.
  • Use masks and transparency effects to integrate elements smoothly.
  • Experiment with double exposure or collage effects.

4. Maintain Brand Consistency

  • Use a consistent color palette and filters.
  • Ensure fonts and styles align with brand identity.
  • Stick to a uniform tone and mood.

5. Edit & Enhance with Software

  • Adjust brightness, contrast, and saturation for visual harmony.
  • Remove unwanted elements using tools like Photoshop.
  • Apply filters or gradients to unify the design.

6. Use Photography for Backgrounds

  • Subtly blurred or minimalistic photos make great backdrops.
  • Ensure backgrounds don’t overpower the main content.

7. Add Motion for Dynamic Designs

  • Combine photography with animation or parallax effects.
  • Use cinemagraphs or animated overlays to enhance engagement.

"We Can Help You Build Your Website – Contact Us Now!"

𝐔𝐧𝐝𝐞𝐫𝐬𝐭𝐚𝐧𝐝𝐢𝐧𝐠 𝐭𝐡𝐞 𝐑𝐨𝐥𝐞 𝐨𝐟 𝐚 𝐆𝐫𝐚𝐩𝐡𝐢𝐜 𝐃𝐞𝐬𝐢𝐠𝐧𝐞𝐫 𝐢𝐧 𝐏𝐫𝐨𝐝𝐮𝐜𝐭 𝐏𝐚𝐜𝐤𝐚𝐠𝐢𝐧𝐠


1. Brand Identity & Consistency

Graphic designers maintain the identity of the brand through different products with color, typography, and visual elements. They make sure packaging also supports the branding of the company, which enhances the recognition of a brand.


2. Grabbing Consumer Attention

The product packaging has to be so captivating within an outstanding competitive marketplace. Graphic designers apply color psychology, various font selection, and creative design elements so that the product appears attractive visually.


3. To Convey Product Information

A well-designed package should clearly indicate essential information like the name of the product, features, benefits, and usage instructions. Designers plan to place text and icons in such a manner that it makes the information accessible.


4. User Experience

Packaging has to be aesthetically functional and user-friendly. Designers will consider the relationship between consumers and the packaging - easy opening designs, clear labelling, and intuitive layout help improve the experience.


5. Differentiation & Market Positioning

Graphic designers help the product position itself in the market by creating a unique visual identity. Whether it is luxury, eco-friendly, or budget-friendly, packaging design has a significant impact on consumer perception.


6. Legal & Industry Standards

Packaging should adhere to legal standards, such as ingredient lists, barcodes, safety warnings, and sustainability information. Designers should ensure that all the necessary details are added without compromising aesthetics.


7. Sustainable & Eco-Friendly Packaging

With growing environmental concerns, designers decide on sustainable materials, minimalistic designs, and biodegradable packaging in accordance with eco-conscious consumer preference.


8. Flexibility in Format

A product can have different variations of packaging such as single-use packs, bulk packaging, or even digital mockups. Graphic designers adapt the designs for various formats without compromising the brand consistency.


9. Creating Emotional Connections

Great packaging design stirs emotions and tells a story. Whether it is in the form of vintage styles, minimalist approaches, or playful illustrations, designers connect with consumers on an emotional level.


10. Supporting Marketing & Advertising Efforts

Packaging is part of a product's marketing strategy. A well-designed package acts as a silent salesperson, enticing customers and influencing purchasing decisions even before they read promotional material.

"We Can Help You Build Your Website – Contact Us Now!"

Tuesday, 28 January 2025

𝐓𝐡𝐞 𝐈𝐦𝐩𝐨𝐫𝐭𝐚𝐧𝐜𝐞 𝐨𝐟 𝐕𝐢𝐬𝐮𝐚𝐥 𝐇𝐢𝐞𝐫𝐚𝐫𝐜𝐡𝐲 𝐢𝐧 𝐆𝐫𝐚𝐩𝐡𝐢𝐜 𝐃𝐞𝐬𝐢𝐠𝐧


1. Improves Readability and Legibility

Visual hierarchy ensures that content is readable and comprehensible by the viewer. The elements are presented in a sequence of importance, where the key message is highlighted while the supporting content is secondary.

  • Example: Using large, bold fonts for headlines and smaller fonts for body text separates the main message from the supporting content.


2. Controls Viewer Attention

Visual hierarchy guides the viewer to what parts of the design are the most important so that they would look at the very important parts first.

Methods Employed:

  • Size-darker objects take up more space.
  • Color-high contrast or bright colors draw to it.
  • Placement-things placed at the top or in the center tend to draw the eye first.


3. Adds Emotional Resonance

Ellicit the right kind of emotional response and allows the designer to bond better with the audience.

  • Example: High contrast image in conjunction with simple text can build drama and, at the same time, is able to drive a message.


4. Enhance User Experience

Visual hierarchy supports the navigation flow of a webpage or application easily. It promotes usability by focusing essential elements such as buttons, menu, or Calls to Action(CTA).

  • Example : A "Sign Up" button, designed with an eye-catching colour and placed on an easy-to-be-seen space on the page attracts more clicks.


5. Supports Brand Messaging

A clear hierarchy helps to enforce brand identity because visuals will align with the brand's tone and style.

  • Example: luxury brands are full of white space, elegant typography, and muted colors that exude class and quality


6. Adds Aesthetic Appeal

It contributes to a higher aesthetic of overall design by establishing balance and harmony. It prevents any element from feeling misaligned or vying for attention in a way that is unnecessary.

  • Typography: Importance is given with bold and large fonts.
  • Color: High contrast and strategic use of colors attract attention.
  • Size: Larger elements appear more dominant.
  • Spacing: Proper spacing creates separation and focus.
  • Alignment: Proper alignment ensures a clean, organized look.

"We Can Help You Build Your Website – Contact Us Now!"

Monday, 27 January 2025

𝐇𝐨𝐰 𝐭𝐨 𝐓𝐮𝐫𝐧 𝐘𝐨𝐮𝐫 𝐒𝐤𝐞𝐭𝐜𝐡𝐞𝐬 𝐢𝐧𝐭𝐨 𝐃𝐢𝐠𝐢𝐭𝐚𝐥 𝐃𝐞𝐬𝐢𝐠𝐧𝐬


Step 1: Prepare Your Sketch

Finalize the Sketch

Make sure your sketch is clean and clear, with well-defined lines and few smudges.

Remove all unwanted marks to minimize effort while digitizing

Scan or Photograph the Sketch

Scan: Scan your sketch at a high resolution that is not less than 300 dpi

Photograph: Use a camera or a smartphone. Ensure good lighting, shadows should be low, and the angle is perpendicular


Step 2: Import the Sketch

Select Your Software

Popular software: Adobe Photoshop, Illustrator, Procreate, GIMP, or Krita.

Use vector graphics software such as Adobe Illustrator for vector designs or raster graphics software such as Adobe Photoshop for pixelated designs.

Import the File

Open your scanned or photographed sketch in your favorite software.

Tweak the brightness and contrast so that the lines are more apparent.


Step 3: Digitize the Sketch

Option 1: Trace the Sketch

Use a drawing tablet or pen tool to manually trace over your sketch. This method gives control over line quality and thickness.

In vector tools, use the "Pen" tool to create smooth, scalable paths.

Option 2: Use Auto-Trace Tools

Tools like Adobe Illustrator's Image Trace or Inkscape's Trace Bitmap can automatically convert your sketch into vector lines.

Adjust settings for line thickness, smoothness, and detail retention.


Step 4: Refine the Design

Clean Up Lines

Reshape uneven lines and fill gaps or overlaps using your software's tools - eraser, path smoothing, etc.

Add Layers

Divide elements: background, objects, text, etc.- for easier organization and flexibility.

Define Colors

Apply colors by using the Paint Bucket tool, gradient fills, or personal palettes. Ensure that layers for color and line art are separate to easily modify.


Step 5: Add Details

Textures and Effects

Textures, shading, and highlights give depth and realism.

Typography

Add text, if necessary, keeping it within the scope of the design's intention.

Final Tinkering

Filters, Blend Modes, Opacity


Step 6: Save and Export

File Types

Save the master file (PSD, AI) for later adjustments

Export as appropriate for usage:

JPEG, PNG: web, social media

SVG, EPS: scalable graphics, print ready

PDF: multi-page document or high resolution print

Resolution

72 dpi for web work

300 dpi or higher for print

Bonus Tips to Succeed

Invest in a Drawing Tablet: Wacom or iPads with Apple Pencil offer precision and natural drawing feel.

Use Brushes and Tools: Try digital brushes that mimic pencils, markers, or paint.

Practice Layering: Keep elements on separate layers for non-destructive editing.

Learn Keyboard Shortcuts: Familiarize yourself with shortcuts for efficiency.

"We Can Help You Build Your Website – Contact Us Now!"

Thursday, 23 January 2025

𝗛𝗼𝘄 𝘁𝗼 𝗗𝗲𝘀𝗶𝗴𝗻 𝗮𝗻 𝗘𝗳𝗳𝗲𝗰𝘁𝗶𝘃𝗲 𝗟𝗼𝗴𝗼: 𝗔 𝗦𝘁𝗲𝗽-𝗯𝘆-𝗦𝘁𝗲𝗽 𝗚𝘂𝗶𝗱𝗲


Step 1: Know Your Brand

But before diving into design, take the time to know your brand's identity.

Ask Questions:

  • What does your brand stand for?
  • Who is your target audience?
  • What emotions or values do you want to evoke?

Research Competitors:

Identify how competitors represent themselves and find a way to differentiate your logo.


Step 2: Select the Right Kind of Logo

Logos come in different styles. Choose the one that best fits your brand:

  • Wordmark (Text-based): E.g., Google, Coca-Cola.
  • Lettermark (Initials): E.g., IBM, HBO.
  • Symbol/Abstract Mark: E.g., Apple, Nike.
  • Combination Mark: A combination of text and symbols.
  • Emblem: A design where text is enclosed within a shape.


Step 3: Sketch Initial Ideas

  • Brainstorm freely using pen and paper.
  • Create as many rough drafts as possible.
  • Focus on shapes, text arrangements, and potential symbols that align with your brand's identity.


Step 4: Choose a Color Palette

Colors trigger emotions and are also one of the major perceptions of the brand:

  • Red: Passion, energy, excitement
  • Blue: Trust, reliability, calm
  • Green: Growth, health, nature
  • Yellow: Optimism, warmth, creativity

Choose colors that will express your brand message and be good both in color and black-and-white versions.


Step 5: Choose Your Fonts Wisely

Typography will define your brand

  • Serif Fonts: Classic, elegant, traditional
  • Sans-Serif Fonts: Modern, clean, approachable
  • Script Fonts: Sophisticated or casual depending on the font.

Ensure readability across various platforms.


Step 6: Refine and Digitize

  • Use graphic design software like Adobe Illustrator, Canva, or Figma to refine your sketches.
  • Experiment with layouts, proportions, and alignment for balance and symmetry.


Step 7: Test Scalability and Versatility

An effective logo works across all platforms and sizes:

  • Ensure it looks good in small sizes (e.g., on business cards) and large formats (e.g., billboards).
  • Test it on different backgrounds (light, dark, textured) to ensure versatility.


Step 8: Feedback

  • Distribute your logo to colleagues, friends, or a focus group.
  • Use that feedback to figure out where changes should be made.


Step 9: Save Final Versions of Logo in a Few Formats

  • Save your final logo in quality formats such as SVG, PNG, PDF, for the use cases mentioned above
  • Prepare color and B&W as well as the transparent background.


Conclusion:

Designing a logo is a creative and iterative process. Keep it simple, relevant, and unique to make your logo timeless. A good logo will be the foundation of your brand identity and help you leave a lasting impression.

"We Can Help You Build Your Website – Contact Us Now!"

𝐓𝐡𝐞 𝐈𝐦𝐩𝐨𝐫𝐭𝐚𝐧𝐜𝐞 𝐨𝐟 𝐀𝐥𝐢𝐠𝐧𝐦𝐞𝐧𝐭 𝐢𝐧 𝐆𝐫𝐚𝐩𝐡𝐢𝐜 𝐃𝐞𝐬𝐢𝐠𝐧

  A perfect alignment will provide a good basis for most graphics designs so as to create harmonious, readable, and professional visual resu...